Crowds
The following notes only cover crowds with rigged agents, which are evaluated in real time during the simulation. Simple setups with instanced geometry caches are not covered here but may just as well be a viable solution.
# Agents
Every crowd instance is an agent.
# Agent Definition
An agent definition typically consists of a rig, one or more agent layers, which can hold different geometry variations or extra geometry and one or more agent clips, which store different animations for the rig.
To start creating an agent definition you need the agent SOP.
In the agent SOP you have multiple options to bring in your rig. The most straightforward way is to use a character rig and bring in a Mocap Biped 3 character that ships with Houdini. This one is especially useful because it comes with many different animation clips which you can use.
I usually start by bringing in a t-posed character rig and name the clip “rest”.
# Geometry Variations > Agent Layers
Agent layers are used to store different geometry variations in the same base agent. You can for example attach different faces, hairstyles, clothing or other accessories to the agent definition, which can be selected or randomized with attributes later on. To attach something to you agent you can use the agent layer SOP.
# Attaching Rigid Geometry (Accessories, Weapons etc.)
I like the old Agent Layer HDA more then the new one when it comes to attaching rigid geometry, which is already placed correctly (hat, sword etc.), because it has the option Keep Position When Attaching.
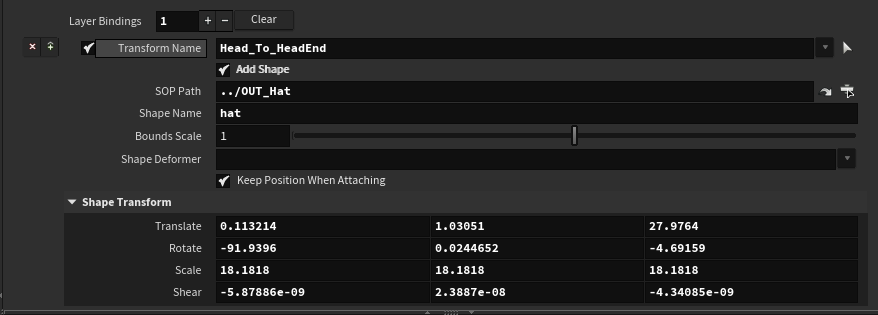
Anything you want to attach, has to have a name attribute. You can pin it to the rig by choosing a bone which is used to transform the geometry correctly. See example below:
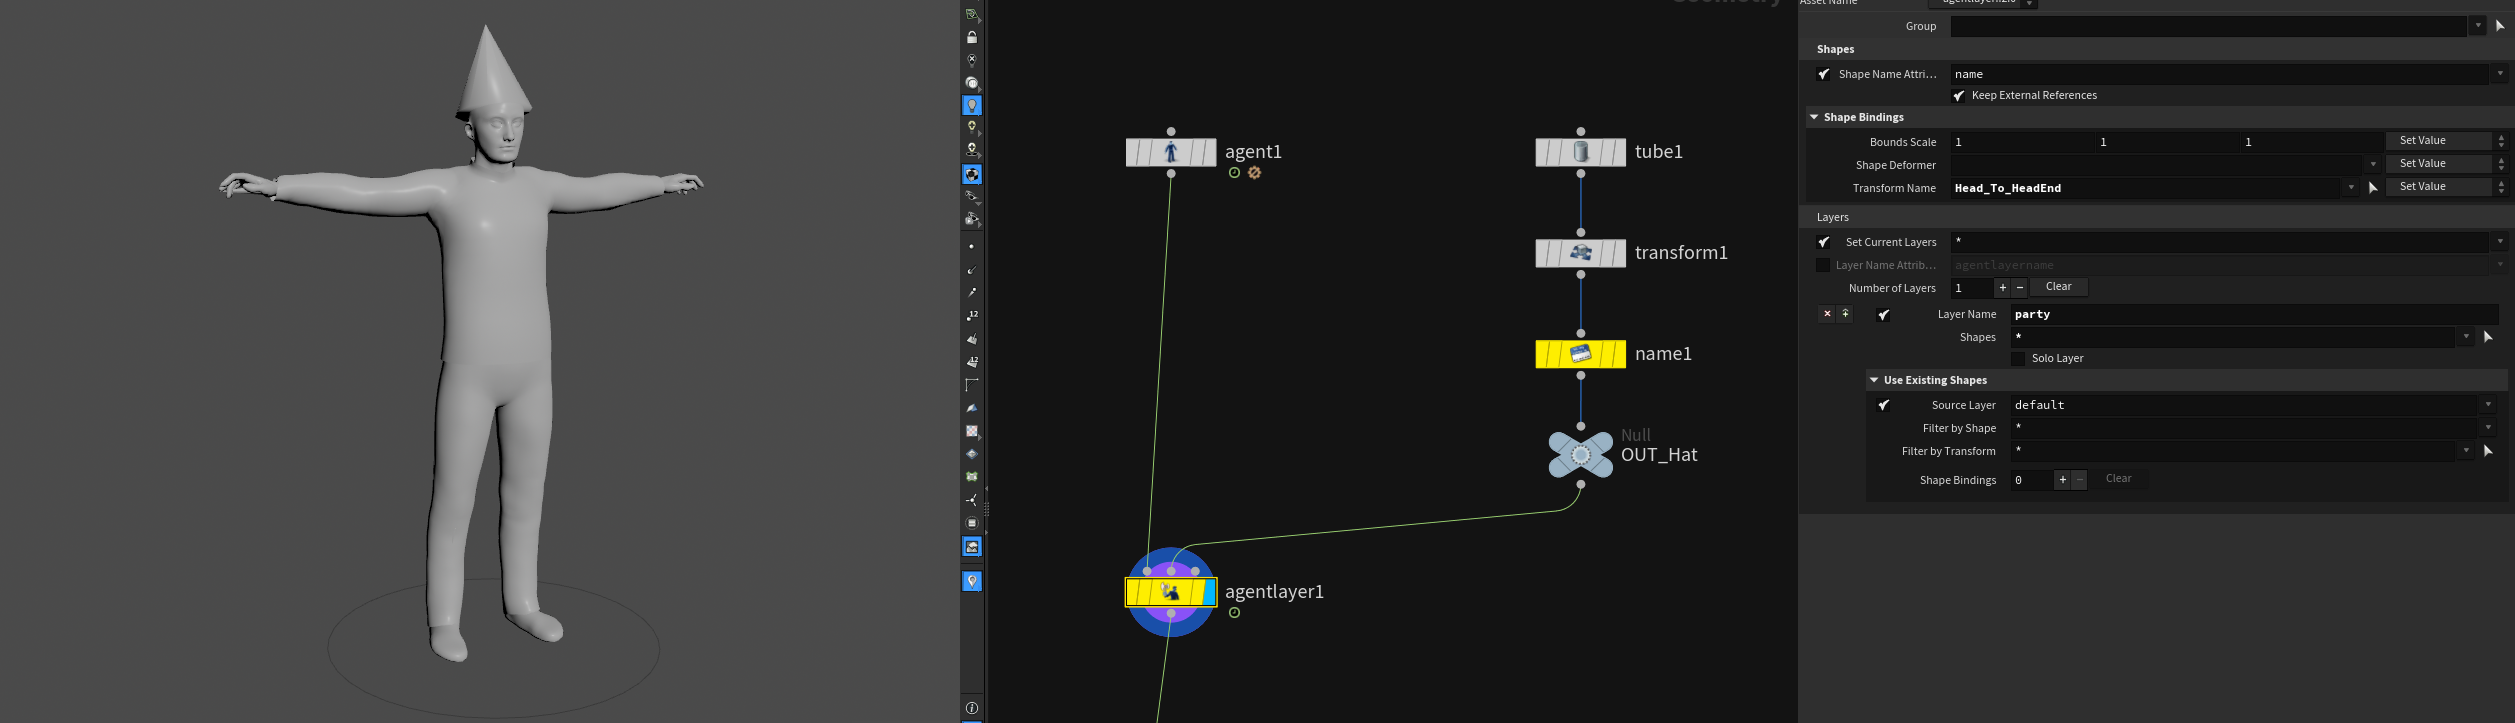
If you want to add something to your base geometry, make sure to activate Source Layer under Use Existing Shapes and set it to whatever you chose to name your default layer.
# Attaching Deforming Geometry (Clothes etc.)
To attach clothes or other geometry that has to be deformed correctly you can leave the Transform Name empty and select a shape deformer.
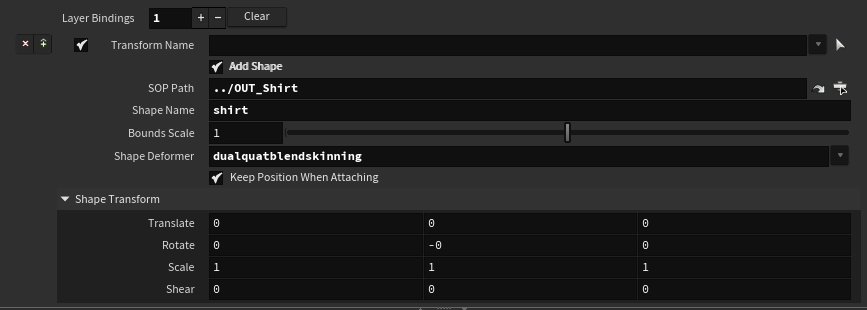
For this to work the geometry has to be bound to the rig. When using the Mocap Biped 3 I just crack the HDA open and bind the cloth geo to the rig using the shelf tools.
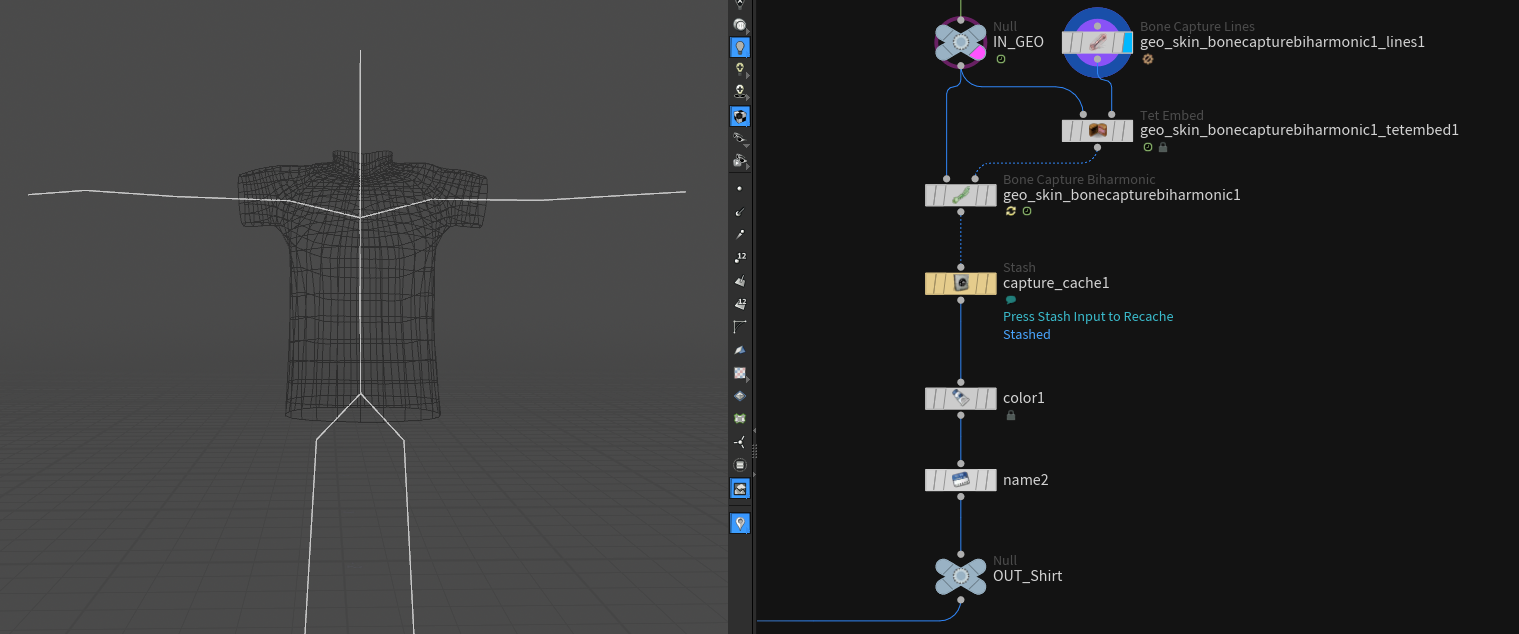
Depending on your geo you may also get away with attribute transferring the boneCapture attribute from you t-posed character after agent unpack-ing them.
# More Animations > Agent Clips
To give your agent more animations you can use the Agent Clips SOP.
You can provide the node with different datatypes:
- Character Rig
- FBX
- File
- CHOP
- USD
- Motionclip
When working with the default Mocap Biped 3 I tend to create many different ones on OBJ level with different clips applied. Then I point the agent clips node to those OBJ objects.
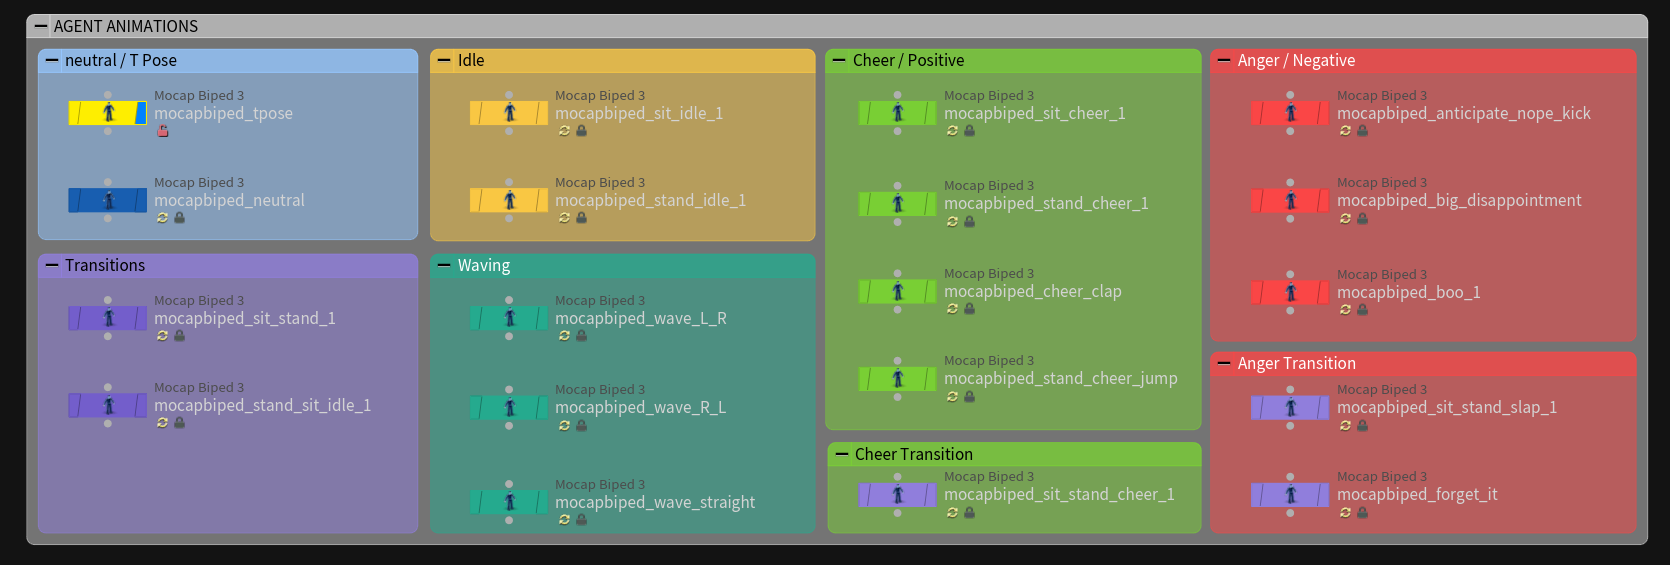
Make sure to set the start / end frame correctly to avoid unnecessary handles. This also comes in handy later when setting up custom looping and blending.
To prepare you agents for locomotion in a simulation you should disable Inplace Animation on the mocap biped 3 and enable Convert to In-Place Animation on the agent clips SOP. More on locomotion further down.
# Debugging your Agent
To visualize a specific agent (correct layers & clip) you can use the agent edit SOP.
To preview a crowd and randomize different aspects you can use the crowd source SOP in combination with crowd assign layers.
# Animation
There are different ways to set up and use animation clips to create a crowd. Depending on your usecase you might get away with simple in-place animation or constant forward speed.
# In Place Animation
WIP
# Locomotion
WIP
# Foot Locking > Agent Prep
WIP
# Clip Transitions
The Agent Clip Transition Graph SOP lets you define, which and how these clips can blend between each other. There is a automatic function, which does a fairly good job a lot of the time. You can as well filter some of those automatic connections out by hand or create new ones that it didn’t pick up by itself. I found the output of the automatic mode too confusing to work with when it comes to working with lots of clips: >15. I often end up just it up manually to be safe.
# Dealing with Mirrored Clips Automatically
In this example I only set up 3 transitions by hand and the wrangle connects each mirrored version accordingly. It just assumes that all the timings and blend durations etc. are identical for the base and the mirrored clip.
![]()
// point wrangle “clipname_to_name”
| |
// primitive wrangle “create_mirror_connections”
| |
# Looping & Blending > Clip Properties
You can use the Agent Clip Properties SOP to specify which clip can loop and how long/where to blend to avoid jumps. This creates a point per clip, which gets fed into the DOP crowd object.
# Dealing with Mirrored Clips Automatically 2
I use the following snippet combined with the one above to manage mirrores clips somewhat automatically.
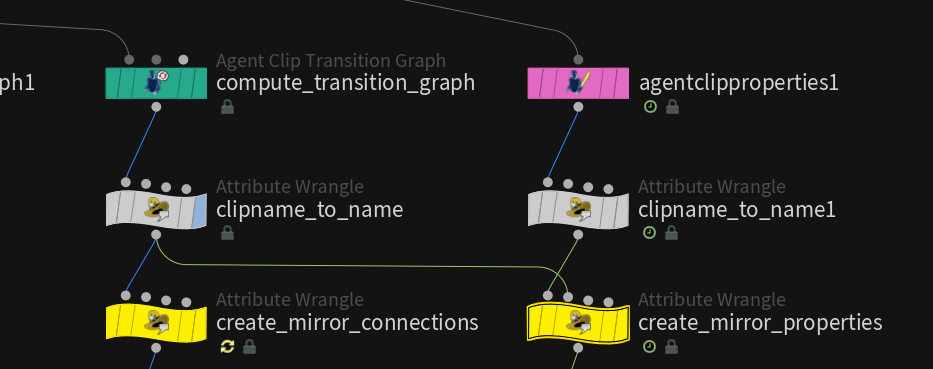
It’s important that it has access to the tranistion graph output via the second wrangle input.
As before we also need to create a name attribute based on the clipname.
// point wrangle “create_mirror_properties”
| |
# Blend Clips Together > Transform Groups
WIP
# Adjusting Clips using KineFX
# Mirroring
The Rig Mirror Pose SOP allows you to flip your clips and essentially double the amount of animations you have practically for free.
It doesn’t work all the time because you need to provide it some kind of rest post / somewhat symmetrical centered frame of your clip.
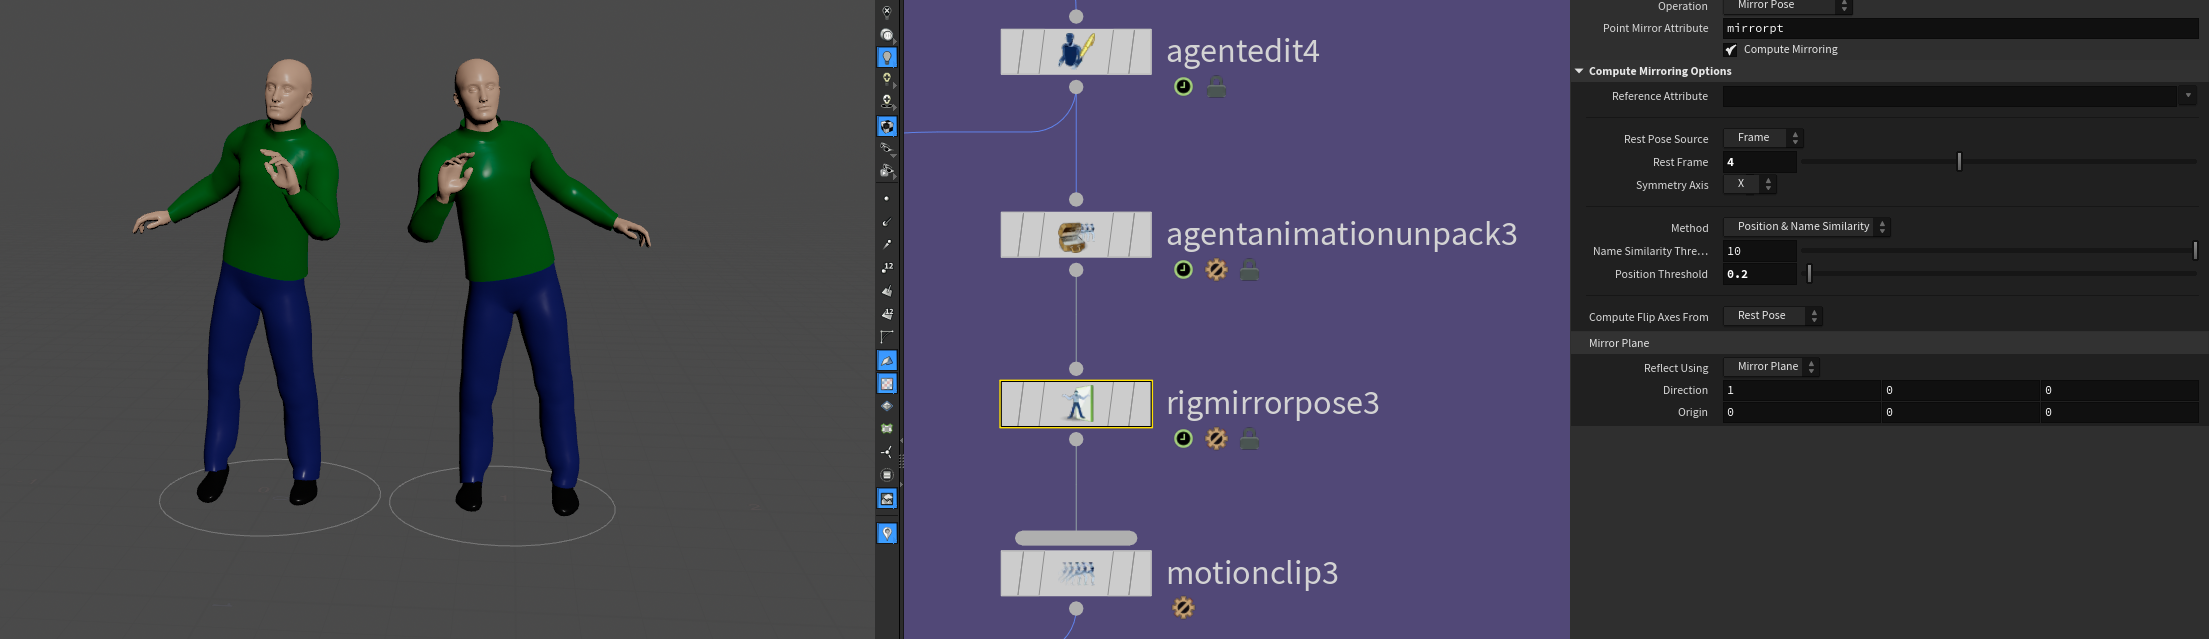
You can feed the updated Motion Clip back in an Agent Clip SOP.
# On the Fly IK Chains
This allows you to easily manipulate and extend your animation library!
- Drop down a
Agent Animation UnpackSOP - time freeze and blast out any bones you want to add an animation to
- animate with a
Rig PoseSOP - Use the
IK ChainsSOP to blend in the animation- make sure to enable
Match By Name
- make sure to enable
- Drop down a
Motion Clipand feed it back to anAgent Clipnode to create a new clip
# Simulation
WIP
# DOP Setup
WIP
# Triggers
WIP
# Forces
WIP
# Ragdolls
WIP
# Partial Ragdolls
WIP
# Vellum
WIP
# Post Sim Tweaks
# Agent Look At
You can make agents look at stuff after having already simulated everything! That is amazing and very simple to set up. You just need a Agent Look At SOP. Pipe in your crowd cache and you are good to go. You can use it in Simulation or in Live mode. If you don’t simulate any turns you just directly modify the skeletons rotation to make each agent look at a target. Might have some snappy unexpected behavior but is usually good enough.
# Rendering
# Solaris, Karma & Hydra Delegates
# Texture Variations in Solaris
- Karma CPU (VEX Shaders)
For VEX Shaders you can modify many shader graph parameters using the Material Variation LOP. This way you can randomize or write custom logic in a vex snippet to define e.g. which path your diffuse texture is supposed to come from.
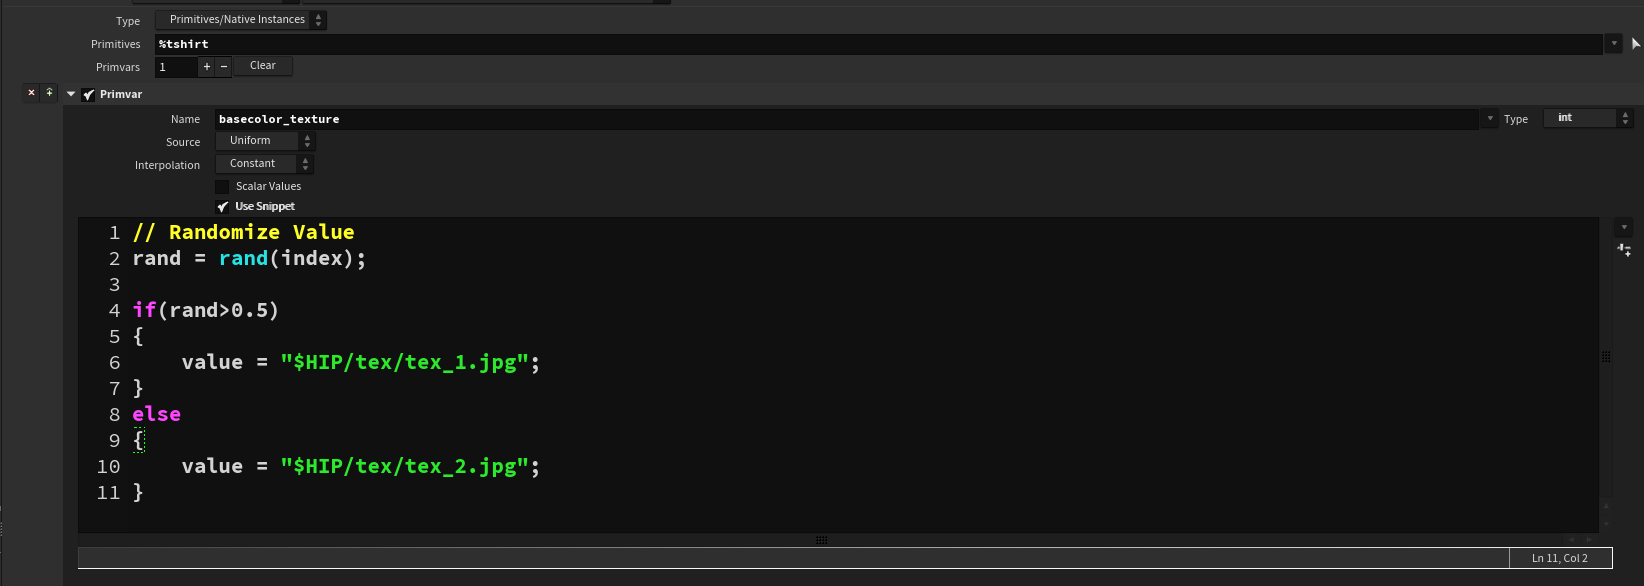
- the index variable is a unique id per element
- the value variable is used to write back to the parameter specified under “Name”
- Karma XPU (MTLX Shaders)
As of now (Houdini 19.5) it’s not possible to get access to the filepath parameters in the MTLX Image node. The only node that can be accessed is the MTLX Geometry Property Value. Unfortunately you can’t feed the MTLX Image node any string inputs. That’s why you have to load in all your textures in separate nodes and vary the assignment with some switch logic based on your geompropvalue input.
I usually assign different point attributes to the packed agent crowd in SOPs and read them in the shader and don’t even bother using the Material Variation node.

# Targetting Sub-Geometry in Solaris
Let’s say you have different agents with different layers. Some of those layers include extra geometry like a hat that requires a different shader than the main agent body. In OBJ / Mantra world you would have assigned the correct shader using material style sheets.
In USD you can’t easily access sub-geometry when you are using Instanced SkelRoots (which is the default and recommended setting when working with crowds / SOP Crowd Import). If you wanted to assign specific shaders to different parts of your agent you would have to import the crowd as SkelRoots (not instanced) which you should probably only ever do for certain hero agents to not run out of RAM.
What now?
You can do this via collections! (a USD thing) The setup isn’t very straight forward though and I wouldn’t have been able to get it to work without this forum post explaining how to do it.
The setup:
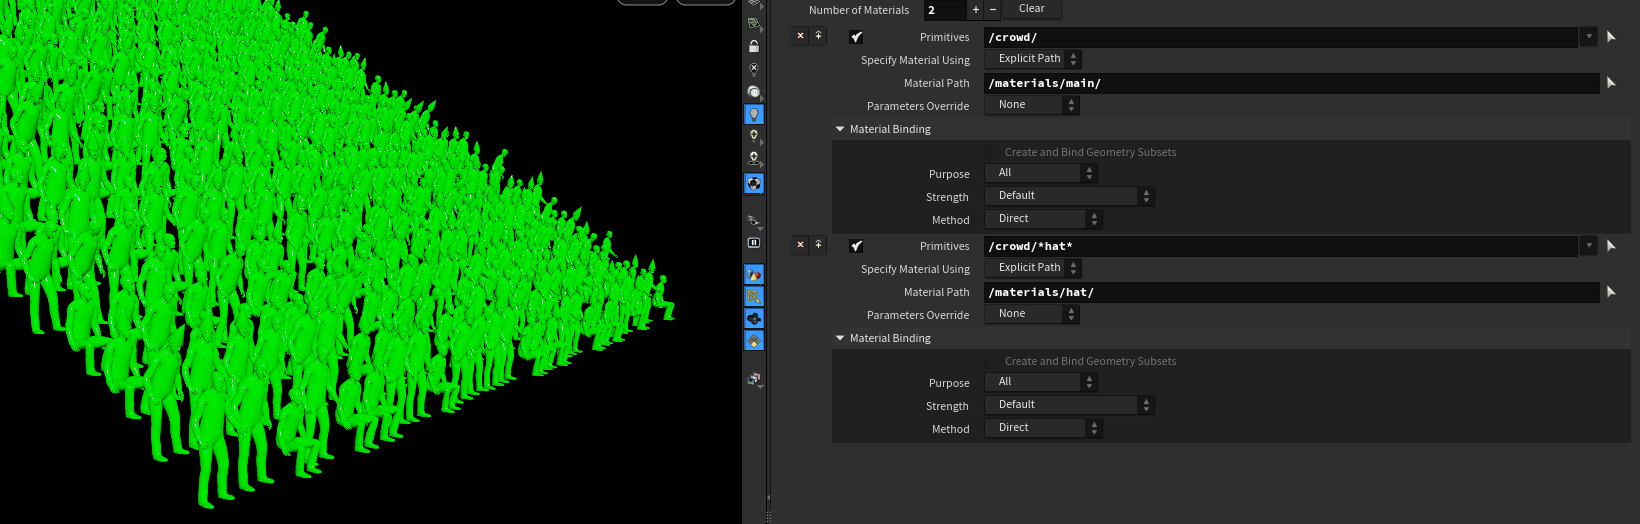
I want to assign the “hat” geometry a different shader then the rest of the agents. As explained above normal assignment using e.g. wildcards doesn’t work:
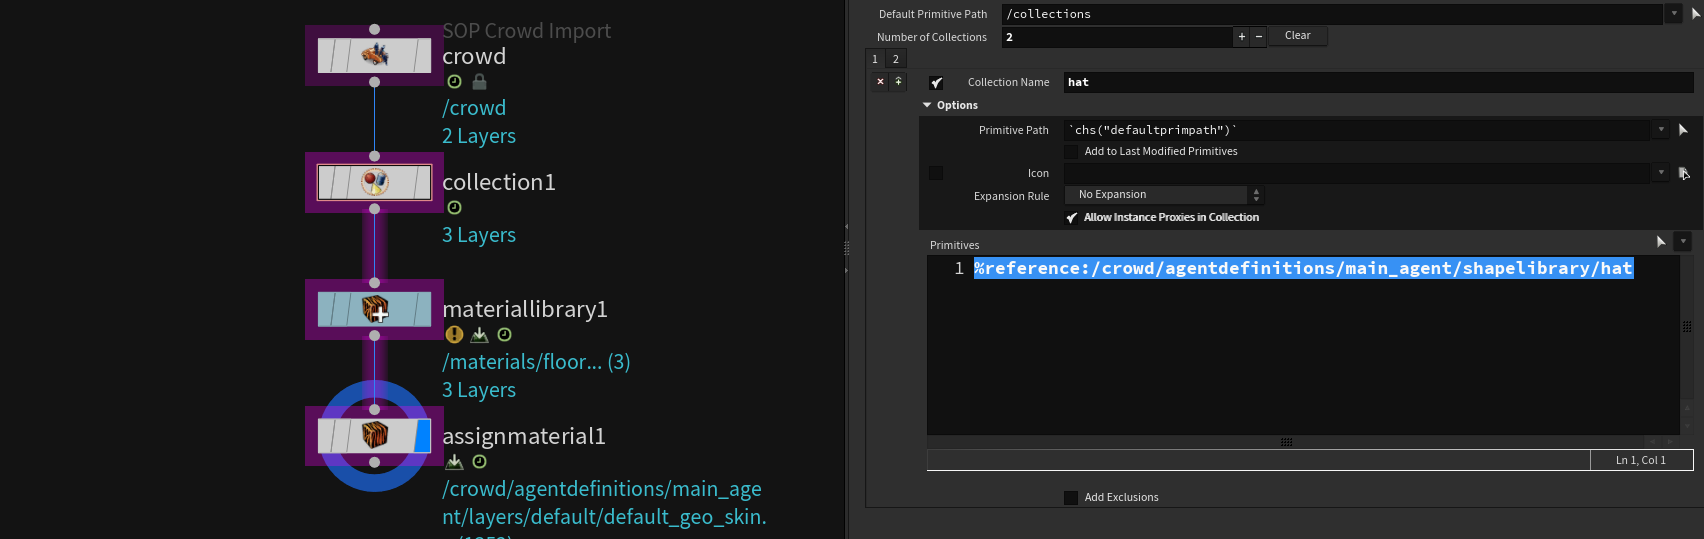
- Drop down a
SOP Crowd ImportLOP and point it to your crowd - Create a
CollectionLOP- give it a name
- check the
Allow Instance Proxies in Collectiontoggle under options - use the
%referenceexpression to point to your geometry
| |
- Create a material library node and build some shaders
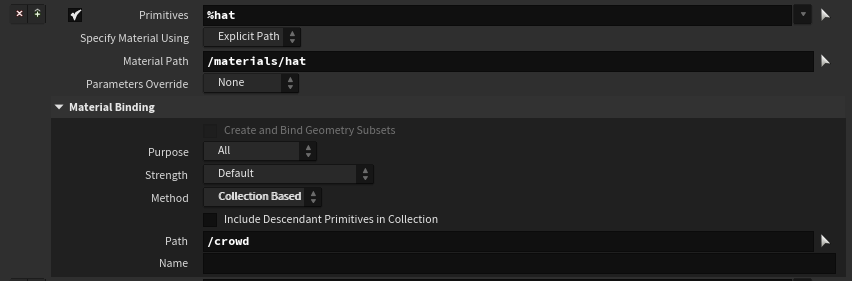
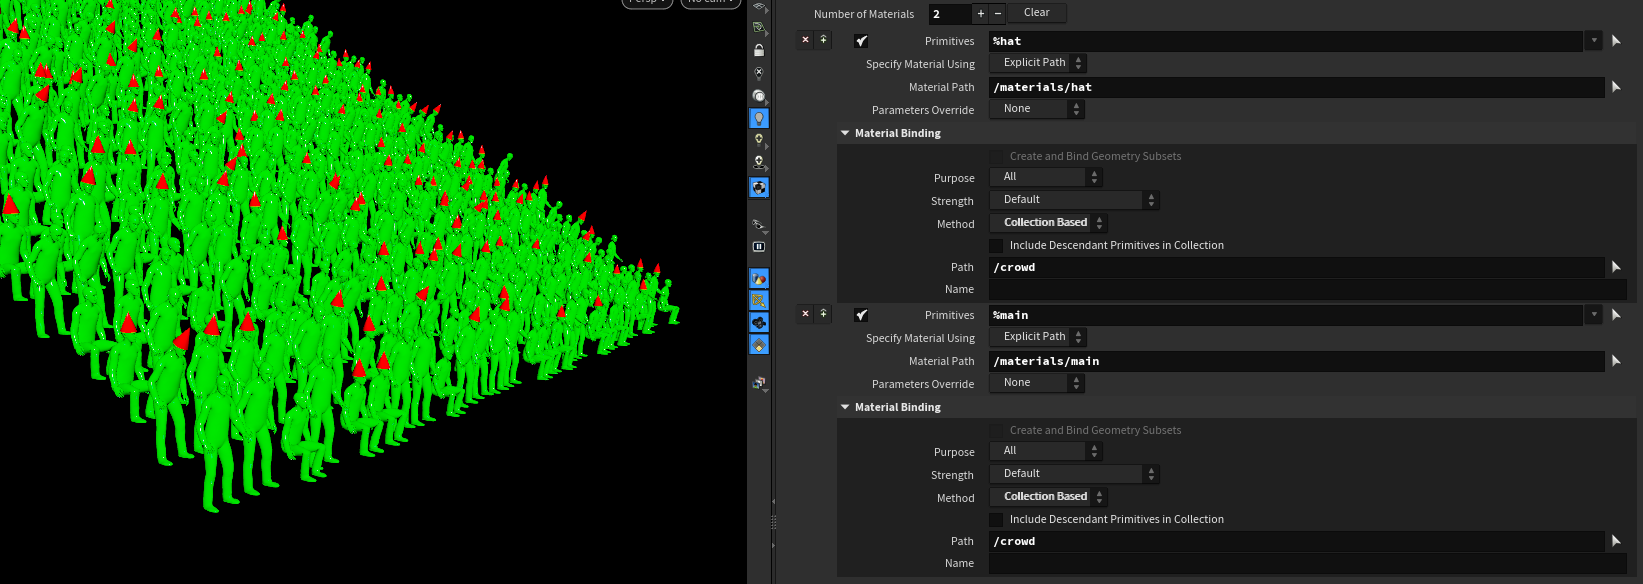
- Use the
Assign MaterialLOP to assign the material based on the collection name- make sure to use
%yourCollectionName - set the Method to
Collection Based - point the
Pathto your crowd object
- make sure to use
This should work in all hydra delegates (tested in Karma & Redshift).
# Mantra & Third Party
# Material Style Sheets
I didn’t bother writing anything down because Mantra and Style Sheets are pretty much gone with USD and Solaris being more and more adopted. The Zombies for Everyone course chapters 20 - 22 give you a good idea of the basics.
sources / further reading: